This was my very first venture into pedal building / pedal repair – and quite frankly…I didn’t have a clue what I was getting into! However, with some (a alot) of help from the folks over at DIYStompBoxes.com (you can see the original post here) I got there.
The reason i’m writing this post is to help anyone with the JH-F1 who wants to rehouse it and also to show anyone just starting out, as confusing as it may seem – you will get there in the end and there is a wealth of knowledge online and friendly people in the pedal community who will help you out.
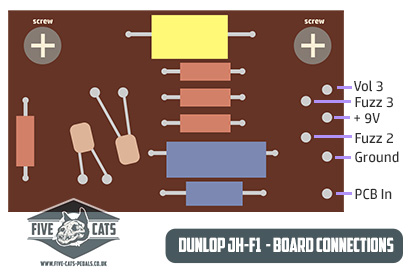
The Board and its connections
When I picked up my board from good old eBay (from PedalPawn infact) – it was just the guts and I wanted to add a 3PDT for true bypass and LED. The problem was – I didn’t know how to do either!
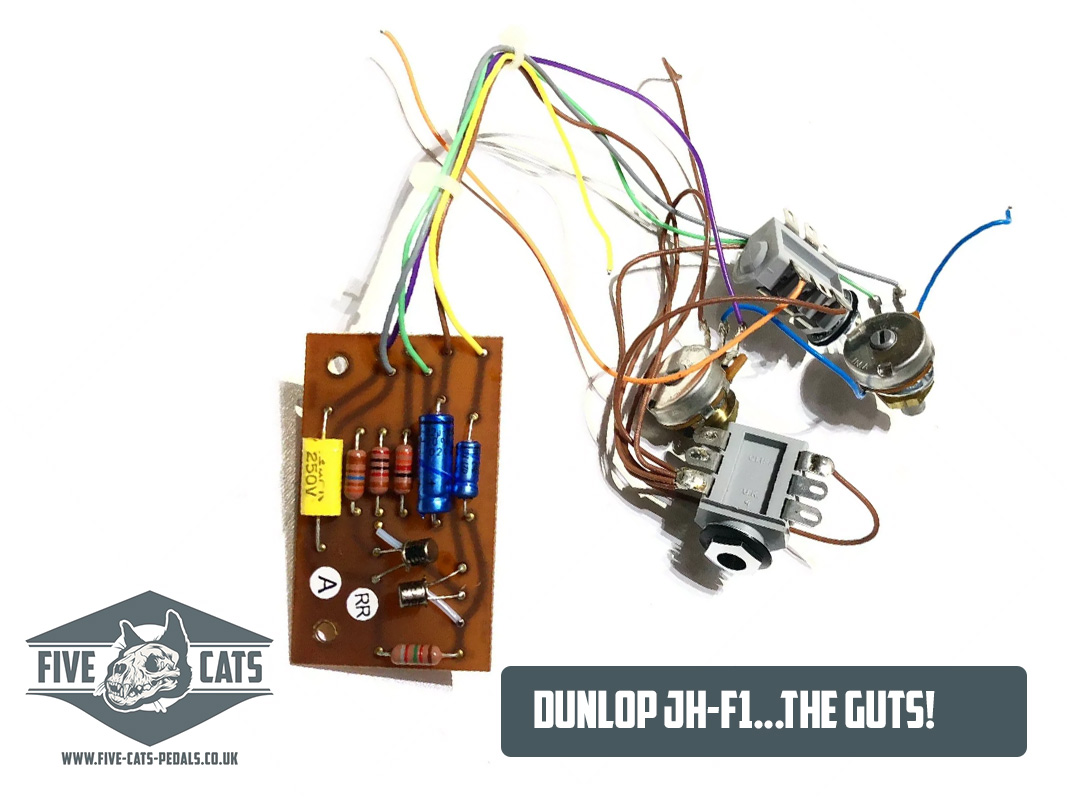
Below are the images of both sides of the board for reference – there are different variants of this board – the newest (as far as I know) features a black PCB with some minor changes – mine is the 2007 run.
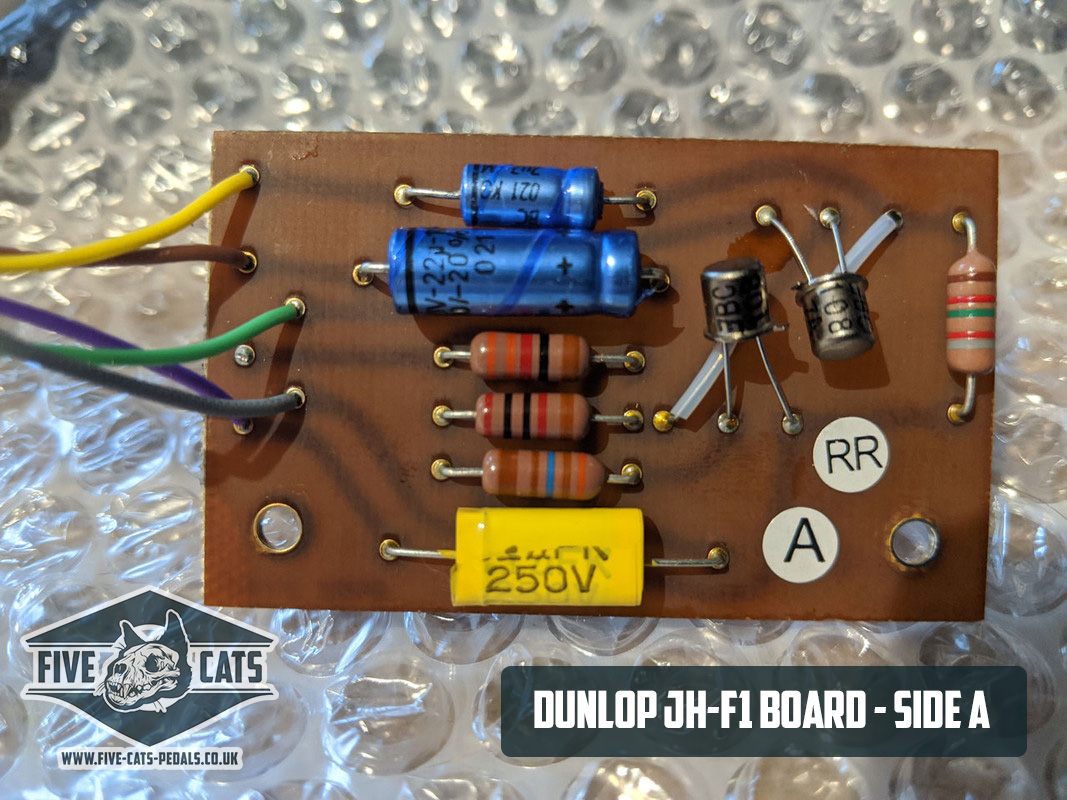
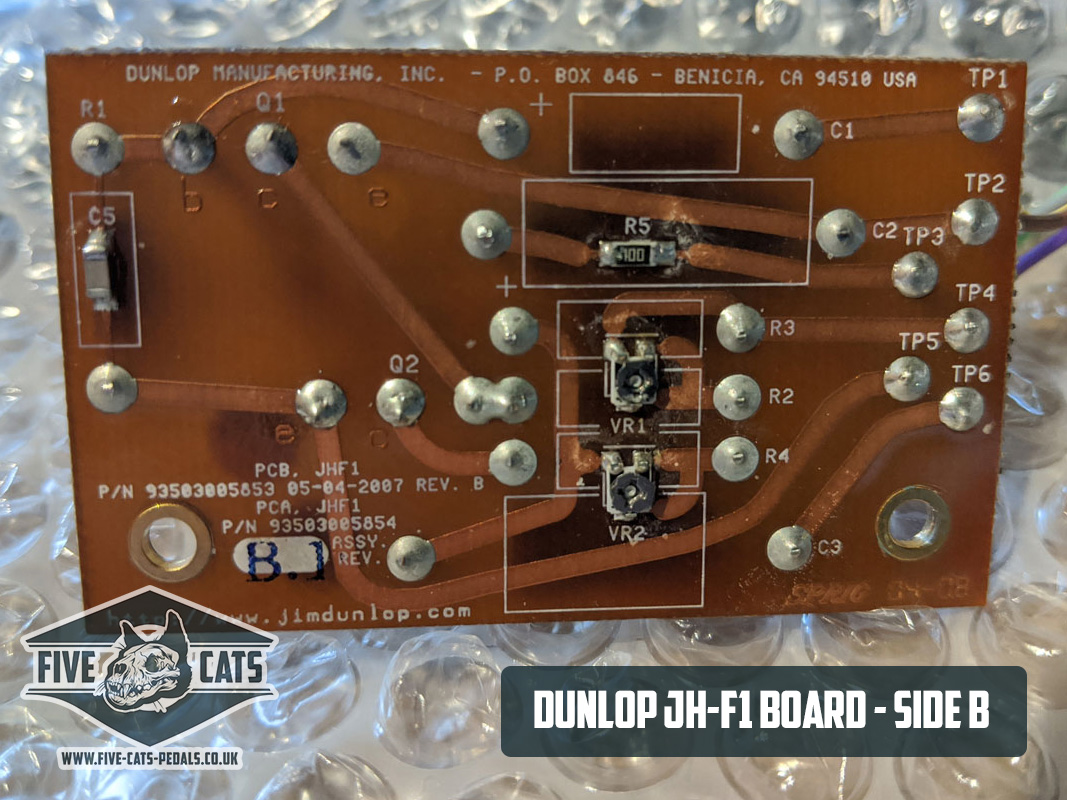
Through a process of elimination and great help I/we worked out the following connections for the board!
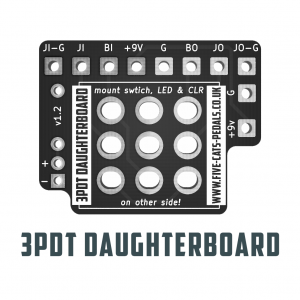
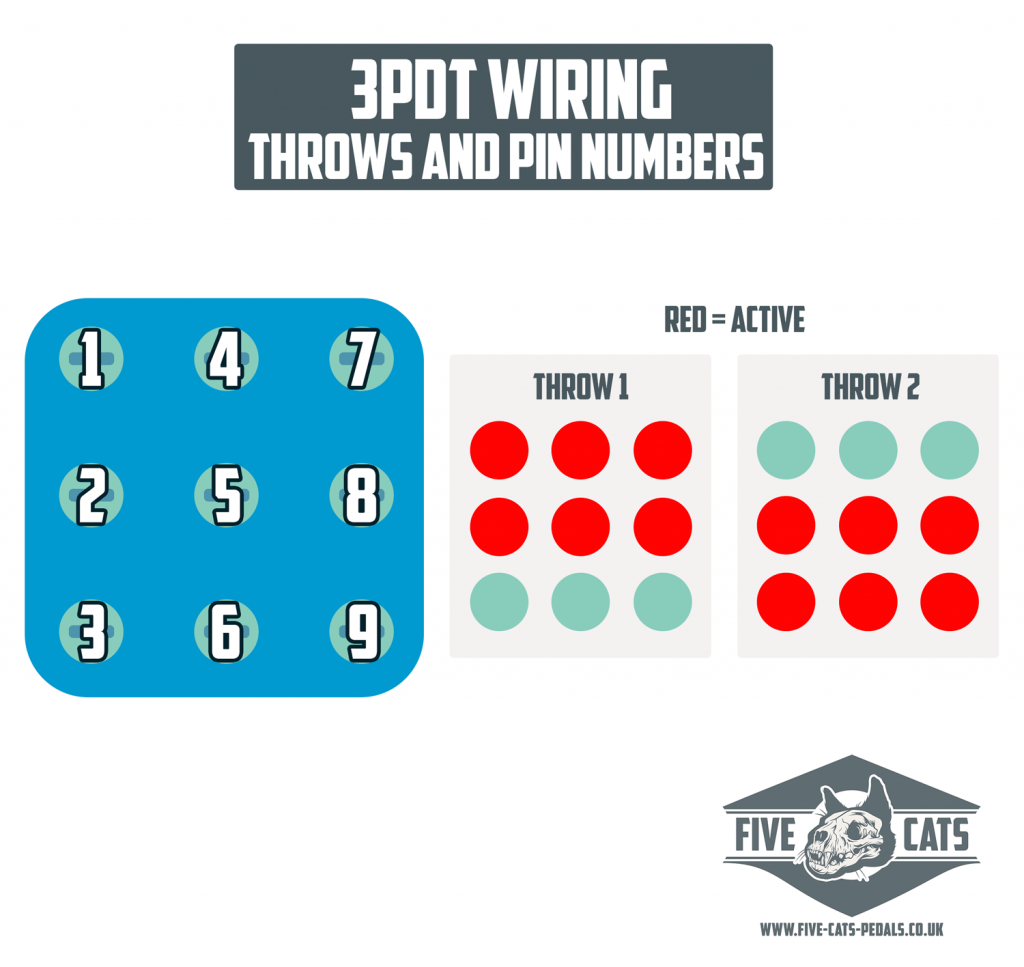
Armed with that knowledge it was time to tackle the 3PDT switch. Again – like most things, there’s an array of different ways for wiring these – below is what I have used since this project and its never let me down – there’s also the diagram for pin numbers and throws just incase. There’s also the even easier route of using a 3PDT Daughterboard – which we sell here.

Combining what i knew from the board and the connections for the 3PDT – I made one final drawing – this helped me no end as I could visualize the final layout.

There’s a lot going on in the diagram, but once you follow it – it’s actually not to bad! (I should re-draw it in an easier to follow fashion…one day!) Having made the circuit up, tested it (and it worked!!) it was time to make a new enclosure for it.
Being my first attempt I went with a Hammond 1590B in orange…lovely! After some careful measuring and re-measuring I marked out the box and drilled it. I’ll be doing a post on templates and designs another day.
After fitting it all in the box and making sure it worked – it was time to print a graphic. I opted for a water-slide (again my first time) – all i’ll say is fiddly bloody things! However…a few goes and it turned out well! My full method for waterslide will be covered in another post but you can see the results below.
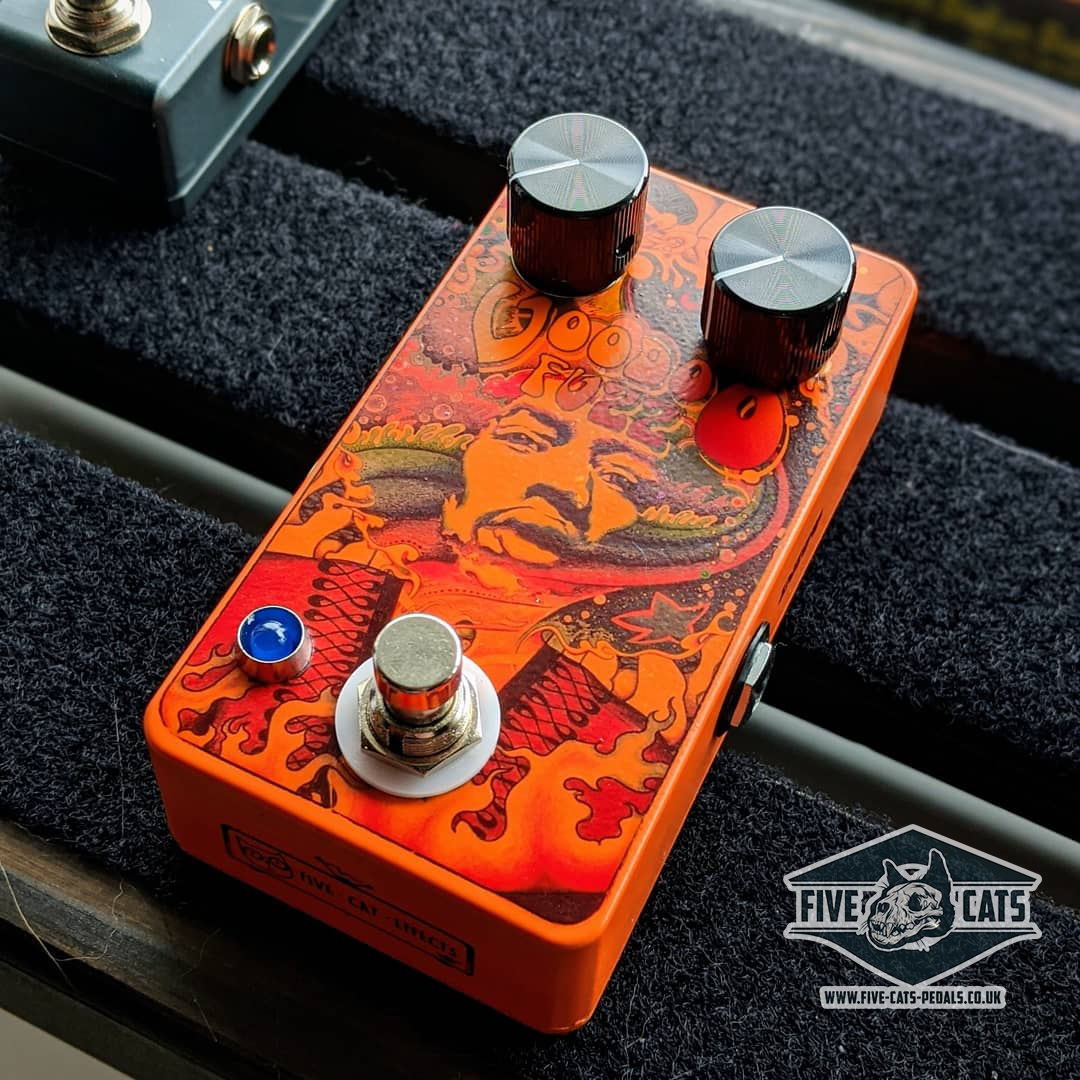
All in all – it turned out great – behold the Voodoo Fuzz! I now have a JH-F1 pedal…that fits on my board without taking up a huge amount of space (that said…i do like the round enclosures so if you have one you’d like to donate just get in touch haha).